Tuesday, September 25, 2012

Woodstove Chimney

Awhile back, Sept 17 to be exact, a long time good buddy of mine came out and gave me a hand with the chimney. Wade helped me one other time when I was strapping the rafters and getting ready to put the roof on. He helped me get the chimney just below the roof line as showing in the above picture. It was getting late and I was still waiting for a flashing to arrive so we did'nt go any further than this.
So, my flashing finally arrived to the building supply store that I ordered it from. When I picked it up, I truly expected to see something on it to say that it is certified for use with a chimney, but I could'nt find anything like that on there at all. t was a rubber boot type flashing that slides tight over the chimney and you just caulk it and screw it down. The reason I thought I wanted to go with this type, was because of the corrogated metal roof. So now the brain is in think mode again. I decided to phone Mr.Inspector to see if I should install it or not. Well he told me no. Said to use a metal one. lol. I had a metal staring at me a few times in one store, but now that I wanted it, it was gone. Finally found one the next day though and started working on it all that day. As for the rubber boot, I tried returning it today, but with no luck. I signed my life away when I bought it to say it cannot be returned because it was a special order. If I were running the store, I would have taken it back, and it probably would have paid off  more for them in the long run to have just returned my money. I JUST Don't get it though. It says right in my woodstove permit that everything needs to be certified but they claim they sell these all the time. Actually they think they proved to me that it is in fact certified, but I still don't know how to tell if it is'nt even on the product. I sure wish everyone who is in the game would all sorta know what it is good and what is'nt. Anyway, not going to lose any sleep over all the stupid bullshit in the world.
     The rest of the chimney situation was up to me. Of course with a little help from mom this time.
And there she is. The completed chimney. Usually when one sees a chimney on a house they probably don't think alot about it. I know I never did, but it seems I take a look at mine quite often  lately. Can't wait till there is some smoke rolling out the thing. It will be awhile. If I had the right stuff, I could have it going in a day, but I am in search of an 18" piece of pipe to come through the wall. Can't seem to find one in town.

I put up another small addition in the bathroom. The medicine cabinet mirror.
I finally discovered what it was in the woodpile that Traction is always going crazy over. Alvin the chipmunk.

Yesterday(Sept 24) was a heavy thought and measure and more thinking type day. And I'm still pretty dumb. lol. Although I think I do have a bit more of a plan of how to get my solar panels onto the roof. Getting the houses own power system up and running is my main concern now for the next little while, although it will probably take awhile just trying to find a good deal on batteries and supplies. For awhile there, I have forgotten all about frugalness and it depresses me that I think I don't have the time to shop around a bit. I walked into the local solar store today to find some little angle iron type brackets to mount my solar panels. They are just little 2 inch long stainless steal double 90 degree angle thingys that you screw to the panel then screw the other end to the surface. Each panel needs four of them. I was told $30.00 for 4. So $30.00 to do one panel. I have six panels x 30=$180.00 for these little tiny peices of angle irons, oh ya, and screws. I think not. That little bit of greedyness just may have screwed them out of a big battery sale, not to mention cables and solar panel wire, offgrid stove, fridge, etc. I do realize that in business, you do need to make money, but just because you have the only solar store around don't mean you're going to rape me. I would love nothing more than to feed the local business, but if I can save a bunch by going for a little drive to the big city, then maybe I'll call it a holiday. We'll see though, maybe it's no cheaper there either. I'm going to build my own little angle iron do-dads though. As far as I am concerned, these little things should come with the panels to begin with. I have no problem paying 30 bucks for a specialized mounting system for each panel, but these are no more than 2" long pieces of  stainless steel angle iron with holes drilled in them. lol. It's crazy. I would have felt like a stupid idiot as I walked out of that store had I purchased this hardware.


Disclaimer--IMPORTANT


This is a personal blog, mainly for my own use. I am building a house with my own two hands, but I am learning alot of things as I go. I do not claim to know what I am doing, or if anything I do is even close to being done correctly or safely. So please, if you are planning on using any of my ideas or methods for your own use, please get professional advice before actually following through with your actions. I will not be held responsible for any injuries or damages of any kind caused by information or comments from this blog.

Sunday, September 16, 2012

Finally Done With the Underground Water Tank

I realize that I have been posting quite alot on this plastic water tank install. I find it to be quite fascinating. I don't know if anyone has ever done this before. I could very well be the only one on the planet. Probably not, but you never know. Top picture shows the plumbing I fitted together to join the two lines down below. The water line will be coming from the tank and hooking in onto the bottom tap.  Then flowing through the one way check valve so the pump will more easily hold its prime.
There it is all connected and going down between the tank and cistern wall. I dropped it down and the bottom line is pretty close to ground level, so that's good.
Little things such as getting down in there to do my thing took some thinking.
Time for the water. And I went in and primed the pump up and everything seems to be working fine.
I put the insulated cover back on top the cistern and installed a permanent fill and breather pipe. It is 3 inch abs for the longer piece, but it is adapted up to a 4inch as it goes into the tank.
Thought I would test my dipper stick out. 650 imperial gallons, which is just about 3 cubic meters. That's 3 metric tonne of water. I'm good for a few days.
My full limit is going to be right around this area here. 1100 Imperial gallons, which is 1320 US gallons, or 5000 liters(5 cubic meters).  This is well over a months worth of water for myself. The tank I put in the ground had such clear writing on it, but the one I did'nt use is pretty faded. I never noticed till now. Had I noticed this before, this one would have gone down.
And there it is. Ready for winter. I'm not going to put insulation on top the tank just yet. Instead I think I will monitor this thing with a thermometer as the days gradually get colder and see what happens.
Ok, let there be snow. Just kidding, I'm really not that eager for winter yet. This whole installation seemed to go pretty well. Hopefully things keep being good.


Disclaimer--IMPORTANT


This is a personal blog, mainly for my own use. I am building a house with my own two hands, but I am learning alot of things as I go. I do not claim to know what I am doing, or if anything I do is even close to being done correctly or safely. So please, if you are planning on using any of my ideas or methods for your own use, please get professional advice before actually following through with your actions. I will not be held responsible for any injuries or damages of any kind caused by information or comments from this blog.


Friday, September 14, 2012

Underground Water Tank Installation


It was a pretty hard day for an old cripple like me. I got that tank prepped to go down in the ground. I plumbed a 90 elbow and the 1" water line on.
I also put a 90 elbow on the line inside the cistern, after cutting the line off pretty short. Then I put on a piece of 1"line here too. I plan to connect the two lines together and tuck them down along the side of the tank as low as possible. I'll have a rope tied on so I can access the connections if need be. I'm pretty sure that the lines won't freeze down there. I think, I hope. I was thinking about installing a short heat tape on each line just incase they did freeze off, but I did'nt have heat tape, and I don't think I'm going to get any either because it is too late now anyway. It aint going to freeze. That's 10 feet below grade on the bottom. I'm ready for some gravel now.

I built myself a real quick sump to put down there. Just so I can monitor if ground water is seeping in or not. I have a pump that was supposed to be able to slide down between the tank and wall and into this sump, but it turned out, that pump wont fit. My calculations said it should, but I have come to the conclusion that the culvert is a little bit oblong in that spot. If I put the sump in a different spot, it would have had lots of room as planned. I'll just have to keep my eyes open for a pump that will fit, incase it needs pumping.
I put in about 1.75 yards of gravel. It's pretty deep, so it should be able to take on a fair bit of water before my tank should decide to float away.
Then some pressure treated plywood for an nice flat bottom.
And then the tank.
Down she goes.
Carefully letting it down. It seems the fittings are still in tact. Guess I'll find out when I put some water in there.

Thats good for this day. Tomorrow I'll get it all hooked up and get the water happening again.
 I did'nt really have to put this tank in the ground. I just wanted to try this out. It'll save me spending a bunch of money on concrete and I think it will also be alot more sanitary this way. If it works, that's good, if not, I'll move to plan B. I bought these two tanks for a Texas mickey of vodka. This tank will easily hold more than 4.5 cubic meters of water. When I lived in town, my water consumption was usually 3-4 cubic meters of water according to my utility bill. So that is more than a months worth of water. I don't think I would want to utilize the whole volume of the cistern as I think the water would be sitting too long and could go stagnate. The top of the tank is 5 feet below grade. I think I'll put some plastic over the tank and lay some insulation right on top of it. I believe this should keep those two water lines from freezing even when the outside temps are minus -40 degrees Celcius  or Farenheit. (They are both the same at that temp).


Disclaimer--IMPORTANT


This is a personal blog, mainly for my own use. I am building a house with my own two hands, but I am learning alot of things as I go. I do not claim to know what I am doing, or if anything I do is even close to being done correctly or safely. So please, if you are planning on using any of my ideas or methods for your own use, please get professional advice before actually following through with your actions. I will not be held responsible for any injuries or damages of any kind caused by information or comments from this blog.

Thursday, September 13, 2012

Getting the tank ready to go down.

Today, it was all about the water system, and probably tomorrow too. This is the tank that's going into the ground, I thought I would give one final cleaning. I think there is 2 leaves still in there that just did not want to come out. I'm afraid I might get stuck if I tried to crawl in there. It's pretty clean now, but was still showing a fair bit of sea weedy type algae or whatever in there when I started this morning.
I fixed the top of it a bit. It is not concave anymore, but who knows, when I start doing my thing in the cistern, it might end up being concave again. Hope not though. I had to build me a special tool to fix the tank. Just an 8 foot 2x4 with a 2 foot peice nailed on the end of it so I could put it in the tank and pry upwards.
Then I thought I better put some water in it and check for leaks. I only put in about 150 gallons, but it did'nt leak at the opening, even when I wriggle the valve around a bunch. The valve will be coming off, and the water line will be getting plumbed on here.
This was a pretty entertaining job, and alot of hard labor. The real soft and sloppy mud I thought should come out of the cistern. I started to pack it in pails. I would pack one up the ladder and then pull the other one up with a rope that I had tied to it. I'm pretty sure that I exceeded the weight limit of the ladder coming up. There was alot flexing going on anyway.
After packing about 8 pails of mud out of there, it was time for a different plan.
I hauled two hoe buckets of mud out. It still don't look the greatest thing for cleanliness down there, but I am now on more solid ground. Tomorrow, if the weather allows, I plan to put some tile rock down there and get it all nice and level. Then I'll put some pressured treated plywood on top the gravel for a nice flat surface. (Just happen to have a sheet and some scraps kicking around). A little plumbing, then down with the tank.


Disclaimer--IMPORTANT


This is a personal blog, mainly for my own use. I am building a house with my own two hands, but I am learning alot of things as I go. I do not claim to know what I am doing, or if anything I do is even close to being done correctly or safely. So please, if you are planning on using any of my ideas or methods for your own use, please get professional advice before actually following through with your actions. I will not be held responsible for any injuries or damages of any kind caused by information or comments from this blog.

Wednesday, September 12, 2012

New Water Plan, Furnace, etc.

The money sure has been flying out of my pockets lately. Everytime I turn around it's more moola gone. Usually I find some good used tires to put on the old GMC. I have been searching, but the 16 inch used tires or take offs are getting harder to come by all the time, now that most the new pickups have seventeen inch rubber these days. I  let my old tires go just a little too far. I had one that was separated, just looking to blow up one day, so I thought I'd just bite the bullet and get a new set. Sometimes I just gotta do what I gotta do. I don't have to worry too much about this truck for awhile now, but I just changed one today on the Dodge that blew up on me last night. They are getting pretty worn out too.
I finally got the furnace up and running yesterday. I am quite pleased with the power consumption of it. When I did my calculations  to figure out if the furnace would be feasible for my solar powered house, I did my figuring using 600 watt consumption, which I thought should be the worse case scenerio. Looking at he watt meter that my furnace is plugged into while she is running with blower going and all, 359 watts. Excellent. That was instant happiness for me. It is better than I expected. As I watched the watts change as the furnace was going through it's cycle, the highes reading I observed was just over 500 watts just as the blower motor was starting up, then it quickly reduced to 359. My 1/2 hp  water pump uses 900+ as it's running and I'm not sure what it is at startup yet.
I got started on my wood stove chimney a few days ago, but kinda got sidetracked on different things since then. The weather has been a bit windy, and a little rainy at times and it just made more sense to do other things. I am waiting for a shipment before the chimney can be completed anyway. I do have 3 full sections of chimney pipe on there since this photo.  I have it capped off to keep the rain and critters out. I should have had the inspector come out and inspect the chimney when it was like this, just to get a good facial expression picture for the blog. lol. I wish this was as tall as it needed to be, I'd be done by now.
I have a few piles of split wood all over the acerage. Every once in awhile I grab the axe and do some splitting. I purchased a 5 pound spitting axe about the time I quit my job. I was initially planning on buying a gas wood splitter, but I totally don't even want one. Not for now anyway, I'm going to see if I can keep up splitting  by hand, or if the novelty will wear off. For now it is actually quite an entertaining thing to do. And good exercise for a man. When you think about it though, if you need to burn gas to split wood, you might as well just burn gas to heat with. I like splitting wood, but I found that with the 5 pounder, some of the big wood was quite a challenge. Could be technique I suppose. I have since bought myself an 8 pounder but hav'nt tried it out yet. I've been looking for a good deal on one for awhile and finally found one on sale.

For the time being, the water that supplies the house comes from the two smaller tanks on the little trailer. I have a hose coming from the tank that ties directly to the hose in the bottom of the cistern which then goes right into pump in the basement of the house. I've had these two larger tanks kicking around for about a year now. Each one of those bigger tanks would hold four times one of the smaller tanks. That is about 1200 gallons or more. I have been doing alot of thinking lately about the cistern. I was planning on dumping a concrete floor into the cistern, but now I think I'm going to experiment with something else instead. My new plan is to take one of those bigger plastic tanks,       and.......
.........put it down there. Even with a concrete floor, water could seep away, or ground water could seep in, which I guess would'nt be the end of the world, but I just think the whole water situation would be alot nicer and cleaner this way. The cistern is 8 foot diameter and the big blue tank is 7 foot 2 inch or something like that. If it works, that would be good. If it fails, I guess I will have to go with the original plan. I spent most of the day today just cleaning up the big tanks. One last contained slimy green slough water and the other had signs of oats. I loaded them both on the trailer and went to the car wash. It costed me 35 bucks to clean them up. I could'nt get them cleaned right out because the vavle is up 2 or 3 inches from the bottom. So I brought them home and pumped them clean while spraying  with the garden hose and giving them a good rinse. They're looking pretty good now. Then it was back to town to the water station. I put 4500 liters into one to see if it actually holds water. That 4500 liters is by far more than I will normally use in a month.

 So that's the plan for now. I'm not in a real panic to get things done, because it always seems to slow me down when I am. And also things don't get done right. It takes me a long time to do things, because I am constantly researching things. Trying to find good deals on batteries, solar panels etc. Things take me a long time to do because of the learning process of everything I do as well. One good example is chimney. I can go to one place and spend 3 times the money for the whole chimney system. But is it that much better? I don't know, but one thing I did find, is that this cheap stuff I did end up buying, is good for the same temperature etc as the expensive stuff.  So I still don't know, but it took awhile deciding. You get a different answer from everyone you ask.

   Another thing that slows my building process down a bit, is the stock market. I treat that sorta like a job, even though I am most certainly not gauranteed an income with it.  I am going to post about that one day soon. I am not worried that I won't be in my house before winter because I know that I will be. I could move into it right now if I really wanted to, but I will try and get some more done and out of the way first.


Disclaimer--IMPORTANT


This is a personal blog, mainly for my own use. I am building a house with my own two hands, but I am learning alot of things as I go. I do not claim to know what I am doing, or if anything I do is even close to being done correctly or safely. So please, if you are planning on using any of my ideas or methods for your own use, please get professional advice before actually following through with your actions. I will not be held responsible for any injuries or damages of any kind caused by information or comments from this blog.
 

Saturday, September 8, 2012

First Bath in 34 Months.

Don't let the title scare you all away, I have had alot of showers in that time, just no baths because I did'nt have an operational bathtub till now. I have been pretty busy working on the house lately, but things hav'nt been always going the way it should. As usuall, things seem to take alot longer than I thought it should. I recently spent about 5 consecutive days working on my water system. The first day of that, I had in my mind one or two hours and things should be up and running. Well, 5 days later. lol. Seems everytime I really want to accomplish things, something backfires. Just trying to get photos up on this blog right now is frustrating me. I have tried a few times lately and gave up cuz it was getting too late. Is there something wrong with blogger, or is it just me. I used to be able to upload photos, not sure what happend now.
   Anyway, I've got my septic tank up and running. The outhouse is having a holiday, and hopefully it is a long one. Last night I had a long hot soak in the tub. Wowwww. Tonight too, dang near fell asleep in there tonight. The pressure system and the water heater is all working good. It took me awhile to figure the water problem out. Using my smaller solar system, my first pump would'nt work. Was'nt sure if I had enough power to run it or not. Then I tried the big generator on it and blew the breaker a few times. I was using a new pump, so it's hard to blame that, but it seemed like it. Long story short, I traded that pump in on a new one and still had problems. After all kinds of experiments and tests, I finally discovered I had a kinked off hose under the cistern. I just thought maybe I had air in the line and it was hard to get it out. Oh well, live and learn.

Whoa, look at that, it's a picture of the sewer system. I just tried to upload some more pictures but it just don't want to cooperate with me. Anyone know whats going on.
(Upload failed:
Server returned invalid response). That's the response when I try to upload  photos from my computer. I wanted to put on a few. Not that there is really all that much to show. Alot of what I have done is'nt real noticeable anyway. I changed my ridge cap, as the other one was a little to small and it did'nt have a snow filter on it. I noticed the other winter before the ceiling was insulated, that I had alot of snow blow up and into the ceiling area and land on the loft floor on the colder windier days. I did'nt think that would be very good over time.
 
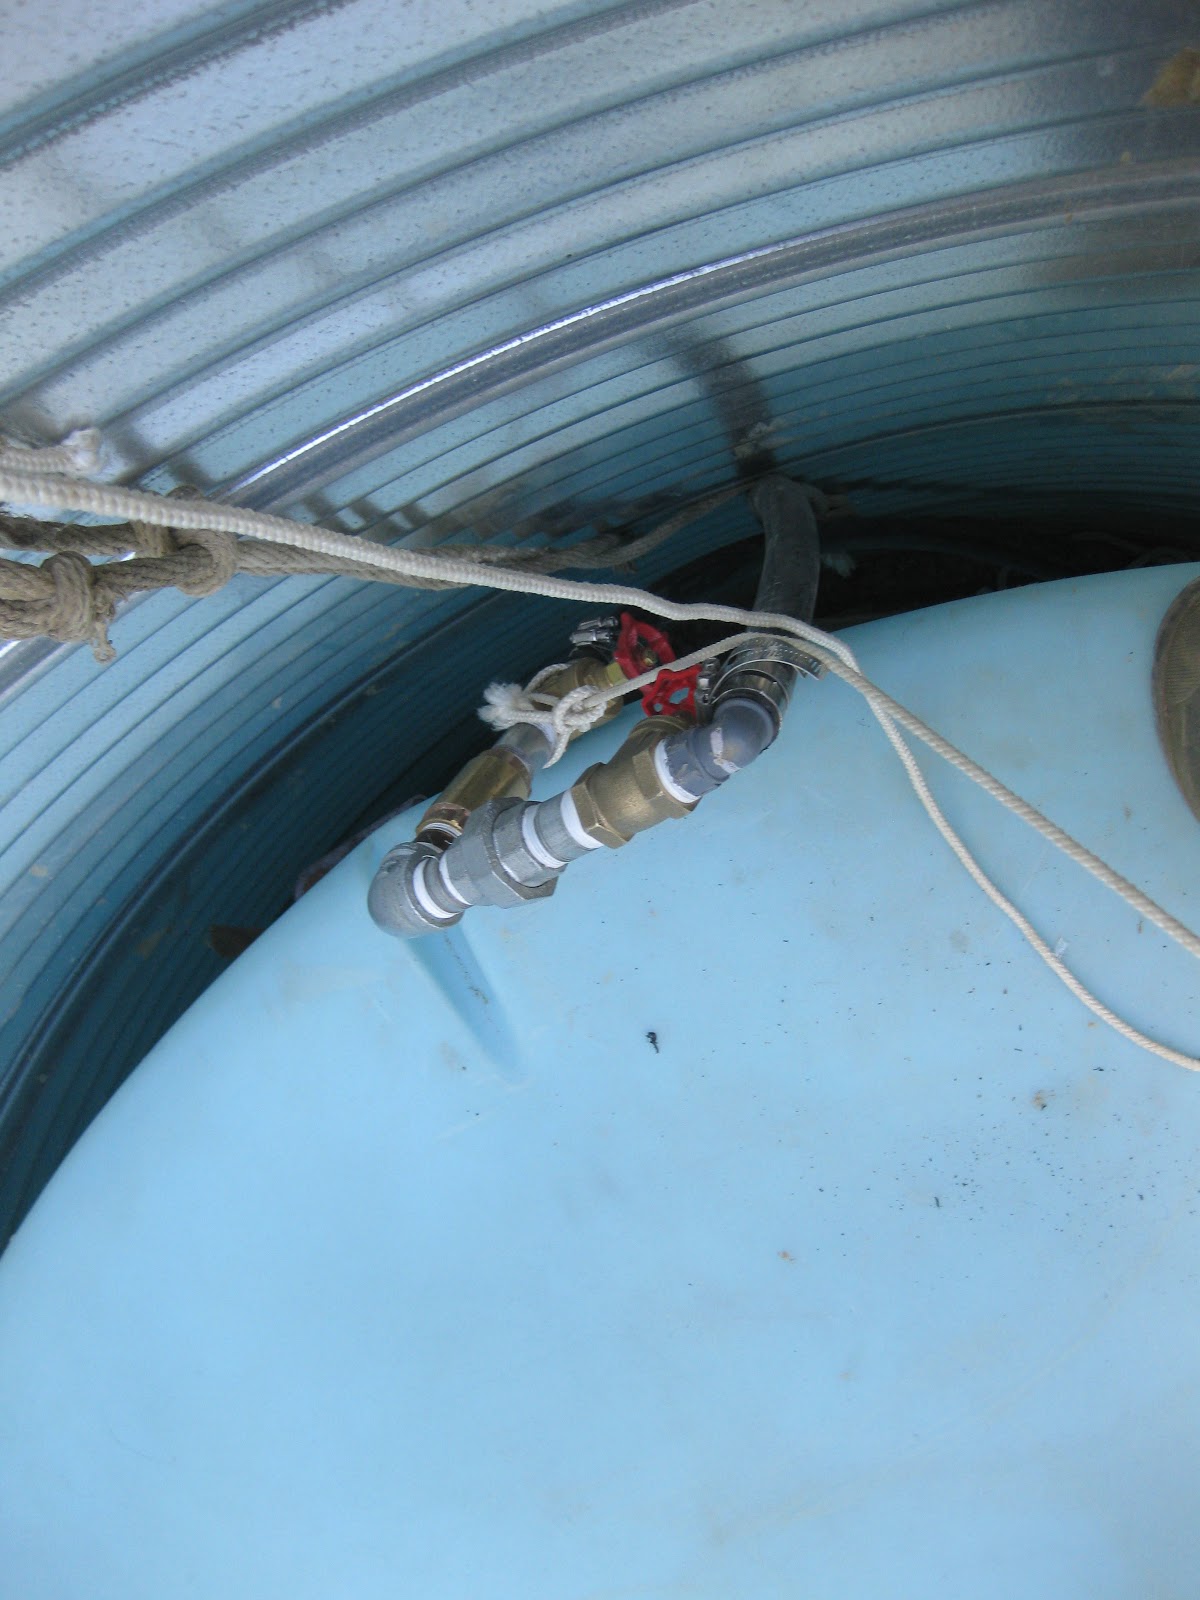
Hey, another picture. This is the bottom of my water cistern which still is'nt in use yet, but soon will be. For the time being the house is hooked into this water line and to a tank on a trailer above ground. Right there where the line goes under the cistern is where it was kinked off. I know it had lots of room when I put it there a long time ago and I can remember thinking this thing could settle a bit, but it must have settled alot more than I thought it would. I had to cut the corragated metal with a grinder and bend the metal up. The hose seems fine, I think. The water is flowing freely through it now anyway. I'm going to do some more preperations here and then soon should be pouring some concrete down  there for a cleaner water environment.

Well, I thought the photos were going to start working, but I guess not. I've got my wood stove down stairs in the basement now (a brother came over and gave me a hand with that), and am in the process of  running the chimney. I need more supplies now. Silly me for assuming that a 12 inch peice of chimney pipe would actually be 12 inches. By code, the peice of chimney pipe is supposed to be at least 3 inches coming into the house before the stove pipe is attached. Mine is only 2 inches. I thought I had this all planned out, but when I measured that 12 inch chunk of chimney, it is only 11 inches. Geeeeee, I really wonder why they would'nt call it an 11 inch chunk of pipe. I mean, 11 is a number also, is'nt it? lol. 12 is 12, 11 is 11. 11 and 1/4 is 11 and 1/4. I don't know, that's just how my brain works anyway. Well I'm going to do what I can without that piece for now until I get to town if I can even find one there. I've also got a rubber boot flashing (because of the corragated tin roof) on order for the top of chimney. I would really like to get this chimney out of the way before moving the ladder for solar panel installation. Moving the ladder seems to be one of the biggest chores I have up on that roof.

I hav'nt even tried my forced air furnace yet. Both heaters are working, but I really think that furnace could be quite handy soon. I'll have to get a thermostat and give that baby a try soon. I don't know why, but the days are really flying by. Guess it could be because winter is on its way here in Canada.
Just a bit of an update for now. I'm going to try and figure out my picture problem now. That will probably keep me busy for a few days right there. lol. Any help on that one would be greatly appreciated.  

Ok, I'm back. I opened a different browser. Using Firefox right now instead of internet explorer. Heres some more pictures in no specific order.
The bathroom. It still needs some ceiling and finishing touches, but other than that, it is quite useable. 
 The second water pump. It is totally different than the first one. With the two big tanks and that one little one, I can fill the tub at least once and flush the toilet quite a lot of times before the the pump cycles on again. I think it's going to work out pretty nicely for a solar powered home.


Just a bunch of chimney stuff scattered all over the place. 

  
Up on the roof again, changing that crown, or ridge cap. This was a good day and a half job. Moving the ladder was the biggest issue. Oh, and going up and down it all the time too. This is another one of my boo boos that I did. When I strapped the rafters (the horizontal 2x4s that run across the rafters that the tin roof scews to) I put a 2x4 across the top(or close to it), then the next one at 2 feet. I did'nt really have much to properly screw my new ridge cap down to. I could'nt screw the flange down like it should have been, so I had to screw  a little higher up on the ridge cap. I'm sure things will work fine (hopefully), but it sure looks amateurish from close up. I would know how to do things if I built another house though.
 These are the vented foamies I installed under the new ridge cap that are supposed to help keep the snow and insects etc from getting in the attic, and yet let the attic breath. 
There is that nasty pipe in the cistern before I fixed the problem.
These guys were pretty busy. I did'nt even notice this thing being built about 4 feet away from the garage entrance, until I got stung one day going into my own garage. That one wasp kinda ruined it for all the rest of them and I declared war. They are now all dead, except for maybe the odd one who was out that night.

Well it's nice to know that I can still put pictures on. I really wish I had more to show, but soon it will come. Oh ya, I even took one of me having my first bath in the house. lol. Did'nt think anyone really wanted to see that one though. lol.

Disclaimer--IMPORTANT


This is a personal blog, mainly for my own use. I am building a house with my own two hands, but I am learning alot of things as I go. I do not claim to know what I am doing, or if anything I do is even close to being done correctly or safely. So please, if you are planning on using any of my ideas or methods for your own use, please get professional advice before actually following through with your actions. I will not be held responsible for any injuries or damages of any kind caused by information or comments from this blog.